Classhy (CLASS-she):
The fusion of classy and trashy; when highbrow ingredients meet lowbrow concepts, and vice versa.

Showing posts with label Tres Frugal. Show all posts

6.15.2010

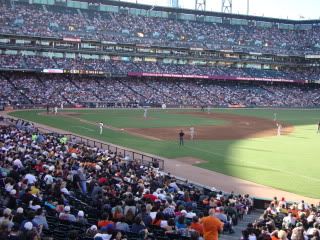
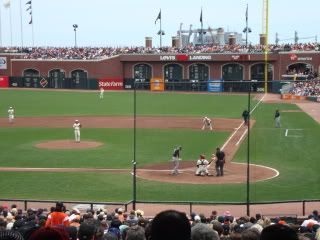
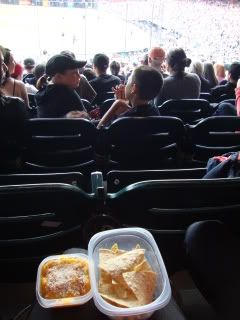
Last Saturday Belinda got hooked up with some Giants tickets and in turn, hooked me up for the evening game against the A's (she rules, BTW). As readers might recall, I had a couple alternate scenarios in mind for some of the elements of my Giant Ballpark Lunch from Memorial Day. I decided to put those concepts to use and packed up yet another bring-in spread for the evening. Since we had spent the day cooking, baking and eating this week's picnic (tune in Thursday!), I packed a little lighter for this AT&T Park meal.

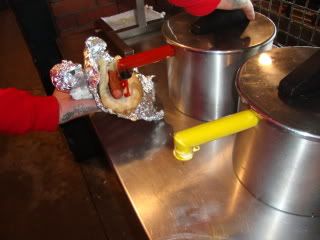
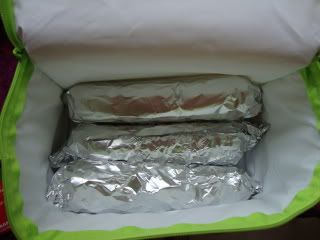
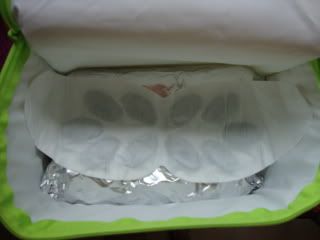
First off, Instead of putting the turkey dogs into their buns before packing up, I just wrapped all four dogs into a piece of foil and then wrapped that with the heat source and into the soft cooler. The buns I just threw into a baggie and brought along in my bag. The outcome was great- we ate the dogs a good hour into the game and they were still warm!

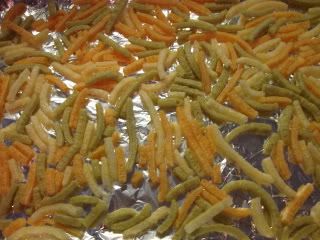
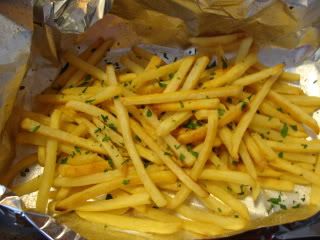
The next element that I'd been mildly concerned about was my SkyBox Garlic Fries. While they'd been delicious on Memorial Day, there was no getting around the fact that there was a wilty element to them. This time around I decided to completely do away with the whole frozen fry approach and use a totally different ingredient. Have you ever had those tri-colored VeggieStix from Trader Joe's? They're made out of dehydrated potatoes, tomatoes and spinach. They're kind of amazing and they totally taste like french fries! Here's how they worked as a more travelable french fry alternative:

SkyBox Garlic Fries- Version 2.0!
Serves 4
1/3 bag VeggieStix or similar product
Spray butter
Garlic salt
Parsley, finely chopped
-Preheat oven to 350 degrees F
-Line a large cookie with tin foil
-Cover foil with a single layer of VeggieStix
-Spray Stix thoroughly with spray butter
-Coat liberally with garlic salt
-Sprinkle on parsley
-Bake 5 minutes


To Travel:
-Toss into a tupperware and throw into your pack!

To Serve:
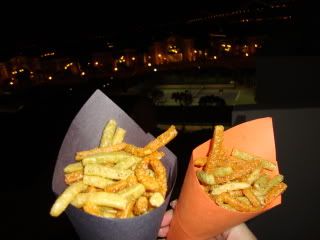
-Create construction paper cones in your team's colors (orange and black!!!) by cutting paper pieces in half width wise and simply rolling. Secure with tape and flatten for easy travel!
-Dole servings into cones and dip into Truffled Ketchup- if you can stand to share it!


Sure enough, this was a fantastic alternate recipe! I definitely love the original SkyBox fries, but I think Version 2.0 will be the one I default to when traveling- paper cones and all!
ps... GIANTS WON!!

6.10.2010

Living in San Francisco can really take a toll on the thickness of one’s pocket book. Whether you’re enjoying eating out at the city’s many fantastic restaurants, exploring cultural events in our rich museum climate or shopping for unique finds amongst its myriad of boutiques, you’re bound to wrap up your day with a shocked “I spent, what?!” when assessing the damage later on at home. Wait a minute…”home”…home... what was I supposed to remem-- Oh yeah-- the astronomical rent is due.
Yet, here we are- Here I am, still shelling out the dough just as fast as it gets baked. But, I live in a city that I truly love and while I know I won’t be here forever, I try to really cherish everything San Francisco has to offer in the meantime. Currently, I live on Nob Hill. I rock a cute studio with a great kitchen, close to work and in a neighborhood of relative safeness. However while my address is definitely classy, its price can tend to leave my budget lookin’ pretty trashy. This last week was no exception, so when my sweetie and I decided to pack up for a little twilight picnic at the park I found myself digging deep into the reaches of my fridge and cupboards for some grub.


Here’s how some forgotten food, leftover ingredients, a little creativity and a couple cheap-ass beers can still provide a meal worthy of your million dollar view!
Introducing this week’s Classh Course Picnic:
Slumming on Snob Hill Summer Spread
We-so-bi Poor Broccoli Slaw, Flat Broke Turkey Paninis
and Penny Pincher Pasta Salad
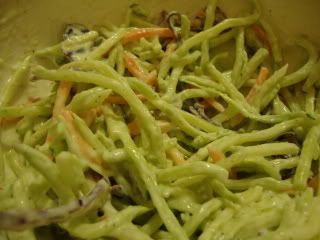
Peeking into my fridge over the weekend, I spotted a half full, rolled up bag of “Eating Right” broccoli slaw veggies from Safeway. The package of julienned broccoli, cabbage and carrots is a great addition to stir frys, as fresh salad fodder and even just lightly steamed with a little garlic salt on top. I’d never actually made a slaw with it, though! As I scanned my door full of condiments and random sauces, my eyes landed on a jar of light green wasabi mayonnaise. This was a premixed variety purchased from the deli counter, but it’s a very easy spread to make yourself:

½ tablespoon wasabi powder*
1 teaspoon water
3 tablespoons mayonnaise (NOT Miracle Whip—it’s too sweet!)
-Combine powder and water to form a paste
-Add paste to mayo and mix well

* ½ tbsp premade wasabi paste can be substituted for powder and water.
**As always with spicy stuff, add more or less of either ingredient based on taste

Never having been a huge fan of traditional coleslaw, the addition of wasabi mayo definitely made me more eager to finally use my veggies for their originally intended purpose:

We-so-bi Poor Broccoli Slaw
Serves 2
2 cups broccoli slaw
3.5 tbsp wasabi mayo
1.5 tbsp Smart Balance mayonnaise
3 shakes of celery salt
-Mix it all together!
-Seal Wasabi Broccoli Slaw up in a to-go container for traveling

Since we weren’t going far for the evening’s picnic excursion, I thought firing up the panini grill (that’s right, I don’t have 2 bucks to my name, but dang it if I don’t have my Breville panini grill!) seemed like a great idea. The gorgeous day was cooling off and the prospect of a nice warm sandwich in the San Francisco twilight sounded like a very appetizing treat.
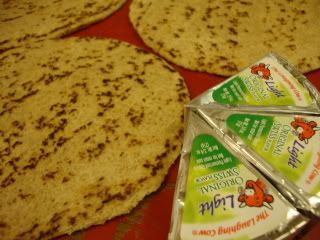
Living alone, it takes me ages to go through a loaf of bread or package of pita. More often than not my bread purchases are made solely when I’m having guests or if it’s recipe specified. In any case, I’m constantly throwing leftover bread into the freezer to save or in the event of a crouton emergency. Sure enough, I discovered a totally forgotten package of Trader Joe’s whole wheat flat bread—perfect! I set those puppies out to defrost as I perused the fridge for panini fillers. Since I hoard Laughing Cow light cheese wedges, a few of those were a given, as were some Claussen pickles, brown mustard and smoked turkey lunch meat left over from my brother’s stay with me that week.

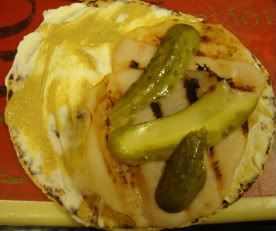
Flat Broke Turkey Paninis
1 Whole wheat flat bread per picnicker
1 wedge of Laughing Cow Light cheese per flat bread
2 slices of turkey cold cuts per panini, slightly cooked on stovetop or Foreman grill
1 Claussen Baby Dill pickle sliced thin per panini
Brown mustard

-Preheat Foreman or panini grill (375 degrees F for panini grill)
-Spread cheese wedge over entire flatbread
-Spread a smattering of brown mustard over the cheese
-Place turkey on one side of the bread
-Top turkey with pickle slices
-Fold flat bread over like a taco and place on grill
-Cook until outside bread is nicely grilled
-Wrap in foil for packing and travel


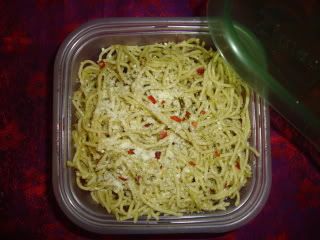
Everyone loves a good pasta salad at the park! Fortunately I had some leftover angel hair and spaghetti squash chilling in the fridge. The inclusion of this stringy squash adds a crisp, unexpected texture to the dish while also lightening up on your carb intake! I found a jar of pesto on the top shelf of my cupboard, scrounged a few pine nuts out from hiding and incorporated a couple staples even the most casual pizza orderer is bound to have lying around:


Penny Pincher Pasta Salad
Serves 2-3
2 cups cooked, chilled angel hair pasta
¼ small spaghetti squash, cooked, scraped from skin and chilled
2 tbsp pesto
1 tbsp chopped pine nuts
1.5 tbsp grated parmesan
2 tsp salt
3 pinches of pizza pepper flakes
-Mix everything together in a medium mixing bowl
-Transfer to to-go container and top with an extra dusting of cheese and a few more pepper flakes


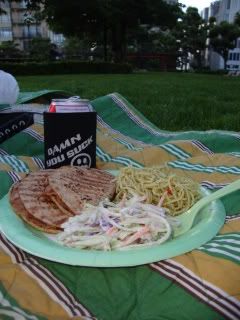
Slumming Summer Spread Picnic Essentials:
-Sweet picnic blanket
-Picnic basket
-Tupperware containers
-Forks
-Plates
-Napkins
-Koozie clad PBR’s
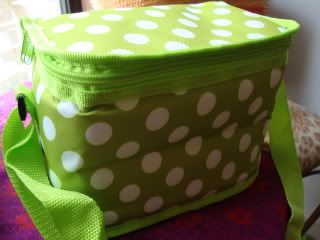
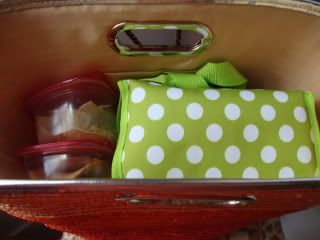
-Soft cooler (optional but always good for containment purposes!)
-Million dollar view (Mandatory)


Sitting on the lawn in the shadow of the Fairmont, we watched the lights go on at Grace Cathedral as we enjoyed our picnic and company. The marble fountain at the center of the park was beautifully lit and Spartacus the Chihuahua came by for frequent visits. Our paninis were warm and gooey, the pasta salad was delicious and the spicy wasabi brocslaw was easily washed down with ice cold Pabst.


Picnic love was in the air and dusk on Snob Hill has never been richer!

6.03.2010

It’s June! Memorial Day has passed, the sun is (sort of) shining and I’ve worn shorts on two separate occasions in the past week. While it won’t be official until June 21st, for all intents and purposes- it’s Summer! One of the joys of this season is the opportunity to take mealtime out of the house, on the road and into nature. Be it at a ball game, on a road trip, in the park or at the beach, a picnic is a great way to get outdoors and spend some quality time with friends, family and food! For this month’s Classh Courses I will be packing up and sharing a classhy twist on different picnic types and destinations, so grab your soft cooler, plastic cutlery and a kickass beach blanket—we’re goin’ picnicking!

Falling on the last Monday in May, Memorial Day usually arrives with beautiful weather and the high spirits that only a Monday off work can invoke. With that kind of energy swirling in the air, it’s no wonder this day is one of those most associated outdoor feasting and revelry.
This year I happened to have tickets to see the Giants vs the Rockies at AT&T Park here in San Francisco. Perhaps one of the most exciting aspects of getting to go to a game is the chance to eat delicious ballpark food! AT&T Park in particular has fabulous eats—the only downside is how fantastically expensive everything is. AT&T Park does allow outside food so long as it’s in a soft cooler (as opposed to a hard plastic one) but does not allow outside alcohol. So, if you want to get your drink on at the park, expect to pay $9 for domestic beers and the same for imports, though the cup size will be smaller. Supposing you order two beers throughout the game, that’s already 20 bucks you’ve spent on top of your ticket price! At that rate, I’d understand if you’ve lost your appetite. Well, never fear, because this week I’ll set you up with tips on how to pack in your snacks without missing out on your ballpark favorites!

Introducing this week’s Classh Course:
Giant Ballpark Lunch
 SkyBox Garlic Fries, Stealin’ Home Turkey Dogs
and Game Winning Nachos

Gilroy Garlic Fries easily take the title of signature food item at AT&T Park. Piled high with chopped garlic and parsley flakes, at lease one order of these fries is bound to get passed around your group on game day. While this treat is undeniably tasty, I will admit the garlic can tend to be a bit raw, tumbles right of the fries and is best enjoyed when mixed into a generous pool of ketchup for fry dipping. With this classhy take on garlic fries you can enjoy this in-demand dish without missing a game changing play while waiting in that ridiculous line! In addition, the use of some unexpected and sophisticated flavors make these fries SkyBox worthy!

SkyBox Garlic Fries
Serves 4
½ package of frozen fries (shoestring or regular, not seasoned)
Garlic salt
2 tsp parsley, finely chopped
Spray butter


At Home:
-Preheat oven according to package instructions
-Cover a large baking pan with a sheet of foil and lay fries in a single layer
-Spray fries thoroughly with butter
-Generously coat fries with garlic salt
-Bake according to package
-When done baking, shake fries to the center of the foil sheet and sprinkle on parsley flakes.
-Fold foil up around fries so they are well contained for travel but not smashed

At the ballpark:
-Unfold foil to create a sort of tray for your fries
-Serve with Truffled Ketchup and don’t forget to share!
**There will be a bit of unavoidable fry wilting in transit. To minimize this effect, you will want to time your picnic packing so the fries come out of the oven and go into your soft cooler right as you’re leaving home. Also, consider eating your fries first once at the game!

Truffled Ketchup
¼ cup ketchup
¼ tsp white truffle oil
1/8 cup canned parmesan
Dash white pepper

-Mix all ingredients together, put in small jar or Tupperware and throw into your picnic basket!


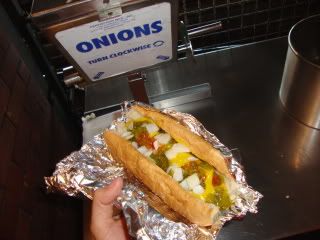
Who doesn’t crave a hot dog on a hot summer day at the ballpark?! This is the quintessential American treat to go along with the quintessential American pastime. These turkey dogs are grilled (boiled meat is so creepy!) at home, slipped into hoagie rolls while still naked and ready to take on the condiments table at the park’s concession stand!

Stealin’ Home Turkey Dogs
Turkey dogs
Hoagie rolls

At home:
-Grill up dogs on the Foreman or stovetop
-Put each dog in a roll and wrap the whole package up in tin foil*

At the ballpark:
-Unwrap your dogs and take ‘em to the concession stand.
-Load up on your choice of yellow and deli mustards, ketchup, relish and even some chopped onions… Yum!


*An alternate method would be to pack the dogs and rolls separately. Roll up the grilled dogs side by side in one foil fold and pack them right next to the heat source. Pack the rolls separately in a bag and don’t forget napkins to transport the assembled “dogs in buns” to the concessions!


There’s just something about the kind of cheese that maintains a certain level of viscosity no matter the temperature… I love it. Sometimes it comes out of a pump dispenser, other times it’s just chillin’ in a little plastic cup with a lid. Usually its origin was in a bag. Admit it, you love it too and that’s why I see so many folks contentedly munching away on their ghetto bagged cheese and semi-stale chip nachos at so many sporting events. Well, even this guilty pleasure can be given a touch of classh and packed in with you.


Game Winning Nachos
¼ can Juanita’s Nacho Cheese
2 tsp grated cotija or queso fresco
A pinch of chili powder
½ bag of your favorite tortilla chips (Viva Casa Sanchez!)


At home:
-Spoon the nacho cheese into a small travel container
-Top nacho cheese with cotija or queso
-Sprinkle all with chili powder
-Bring enough chips for everyone in your group!

At the ballpark:
-Simply open everything and enjoy not having paid $8 for your treat!

Required Picnic Gear
Soft cooler
Larger basket, bag or backpack
Tin foil
Assorted Tupperware containers
Personal heat pack (ThermaCare HeatWrap-- found at Walgreen's, RiteAid and larger grocery stores)


Packing up:
The Cooler
Option 1:
     1. Hot dogs in buns go on the bottom of the cooler
     2. Place heat source on top of dogs
     3. Set fries packet directly on top of heat
     4. Squeeze in any additional dogs
Option 2:
     1. Place single package of all bun-less dogs on the bottom of the cooler
     2. Set heat source directly on foil wrapped dogs
     3. Pack fries in on top of heat

Now pack your cooler and all your additional accoutrements into your larger bag and head out. If taking public transit, be wary of other passengers trying to snatch your bag- you’ll be wafting tastiness!


4.22.2010

Happy Earth Day!
Here’s a fun way to put your recycling to use:

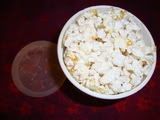
Très Frugal Microwave Popcorn Popper

Popcorn is the greatest snack on the planet. As a little girl I can remember sitting on our kitchen counter as my mom air popped white fluffy goodness into a big paper bag. The little dish on top of the noisy 80’s era popper held a pat of butter which melted as the hot air hit it and then got poured over the freshly popped kernels. Some salt, a little sugar and a thorough shaking of the paper bag, she’d pour the contents into a giant mixing bowl and then, I was in heaven.

Pop Stir
Nowadays I remain non discriminatory in my popcorn love—stove popped, microwave, movie theater, store bought, Jiffy Pop, old fashioned stand up popper, Christmas tin, ball park and SmartFood. You name it, I crunch it. If I had to pick a favorite, though, I’d have to turn back to my roots and the comfort of good ole home popped corn from raw kernels. Not having an electric air popper at my disposal, I’ve employed a number of methods to get my fix. There was the classic kernels in a pan method, but it’s very labor intensive and there’s something very grating about dragging a pan back and forth over the stove top. Then one day at Ross I stumbled upon a metal “Pop Stir,” which brought the use of a crank into the stovetop equation, and for a couple years this was a pretty viable solution. The only problems were that the metal would heat up like a motorcycle exhaust, it needed a full cup of kernels to stir and my frequent use caused the plastic stirring wheel to crack, rendering it frustratingly useless. After wearing out THREE of these devices, I was ready for a new solution.

One afternoon I was hoping to make a little snack for my equally popcorn loving bunny, Trickzie. Not wanting to bust out the Pop Stir for a single little handful, I thought to put a few kernels in a small lidded yogurt container that was waiting to be recycled. I snapped the lid back on and put my experiment in the microwave. In my first attempt I saw the lid get popped off and kernels go popping everywhere-- but after a little engineering, I got the concept just right… and the resulting popcorn was perfectly popped! Now that I had bunny sized single serving snacks perfected, it was time to make a people portion popper too!

Here’s how to do it:
1. Wash out a 32oz lidded yogurt or cottage cheese container.

2. With a sharp knife, carefully cut (or if you’re in Santa Cruz, shank) X’s into the lid.


3. Use only as many kernels as will fully cover the bottom of the container… then add a few more for good measure :)


4. Now put the lid back on and stick in the microwave for 2min 30sec. Since microwaves will vary it’s important to pay attention on your container’s maiden poppage. Somewhere between 2 and 2.5 minutes you’ll hit the sweet spot… you’ll know the popcorn is done when it slows to 2 seconds between pops.

5. Take the popper out once it hits it’s sweet spot and note the time for later uses. Keep in mind to always keep one ear on your corn (haha), as you don’t want it to burn. 

(Note: popper will be a bit hot… make sure you have a surface to put it down on quickly.)
Now you have two perfect servings of popcorn-- or, if you’re like me, ONE perfect serving of popcorn!

And now to classhily dress your nekkid corn:

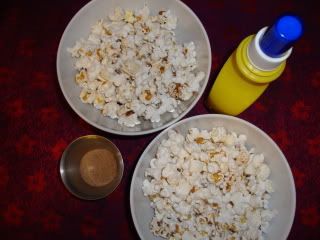
1. Spray a few spritzes of butter spray or a light mist of water from a spray bottle
2. Sprinkle your desired amount of popcorn salt
3. Lightly shake corn, repeat spray and sprinkle cycle until satisfactorily covered.
Enjoy!!

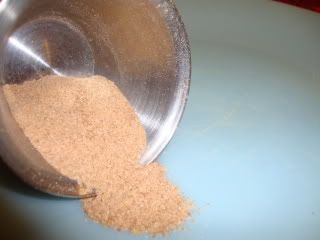
To easily make your own flavored popcorn salts:

1. Choose your favorite dried herb(s) or seasonings
2. Combine with sea salt at about 1:1 ratio
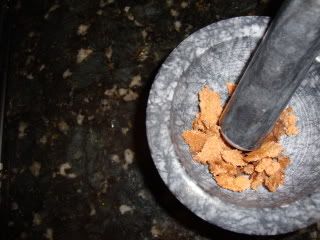
3. Grind into a very fine powder with the use of a mortar and pestle or even an electric grinder (like for coffee)
Voila!

The finer your salt, the better it will stick to your popcorn


Last time I was at the grocery store I saw a great range of seasonings that would be great—BBQ flavored rubs, lemon pepper, chipotle and sundried tomato… get creative!