Classhy (CLASS-she):
The fusion of classy and trashy; when highbrow ingredients meet lowbrow concepts, and vice versa.

5.25.2010

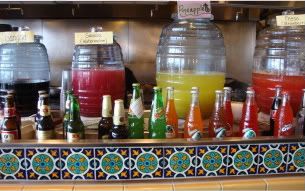
Aguas Frescas
Fun, simple and refreshing beverages that you can easily make at home to accompany your favorite classhy Mexican delicacies!
A popular treat, aguas frescas are found on street carts, in taquerias and also in many sit-down restaurants. Common flavors include fresa (strawberry), jamaica (hibiscus), melon (cantaloupe), horchata (rice water), pina (pineapple), sandia (watermelon) and even pepino (cucumber)!

Here is a quick fruit based recipe for you to try:
3 cups of cut up fruit (peel and seed melons)
8 cups water
1/2 to 3/4 cup sugar
Lime juice to taste (optional)

-Liquify fruit with 2 cups of water in a blender
-Strain pulpy liquid through a wire mesh strainer into pitcher
-Add remaining water, sugar and optional lime and keep chilled
-Serve over ice

*Mix it up! Experiment with adding additional herbs like mint, cilantro and lavender. Try combining two different fruits to customize your flavor.
**REALLY mix it up by adding your favorite tequila, blending with ice and serving in a sugar rimmed glass.

5.20.2010

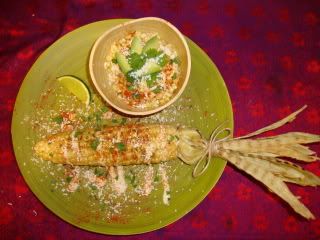
One of my favorite sights while exploring Mexico was always the elote cart. In the midst of a day of walking cobblestoned streets in San Miguel de Allende or perusing bohemian bookstores in Coyoacan, there is hardly a better treat than a cup or ear of boiled corn slathered in mayo and chili. Because of the coarse texture of the corn that is generally used, my mom used to call it “horse corn,” but I still loved it- grittiness and all! So I’ve set out to re-invent this beloved street food for this week’s Classh Course:
Elote Mayo Verde
2 ears of corn
1 large garlic clove, slivered
2 tbsp chopped cilantro
1 lime
¾ cup SmartBalance mayonnaise
¼ cup green taco sauce
¼ cup grated cotija cheese*
Chili powder to taste
Salt
Spray butter
Avocado, sliced
Twine
Squeeze bottle

To grill corn:
-Preheat grill or griddle to med heat
-Soak corn (husks intact) in cold water for 10 minutes
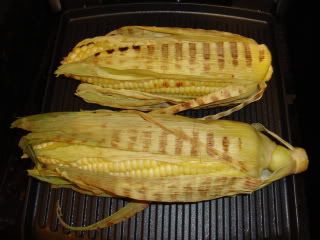
-Pull back husks, remove silk and spray kernels with butter. Salt the corn, then tuck slivers of garlic around the corn as you replace the husk.
-Set corn on the grill, covered and turning often until husks are nicely charred. About 10 min.
-Pull back husks, tie with twine (if grilling on a BBQ, be sure to soak the twine in water first to avoid any mini fires), spray with butter once again and replace corn on the grill for about 10 – 15 minutes, turning frequently for nicely blackened kernels.

Mayo Verde:
-Combine the juice (and pulp) of one lime, mayo and taco sauce. Stir until well blended.
-Salt to taste.
-Transfer mayo verde to a squeeze bottle for application and storage.


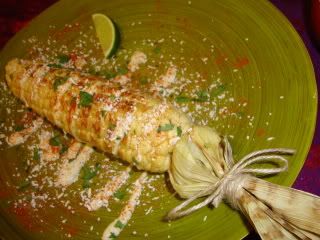
For elote on the cob:
-Transfer ear(s) to a plate and squeeze mayo verde over top.
-Sprinkle with chili powder to taste.
-Generously dust with grated cotija.
-Finish off with chopped cilantro.

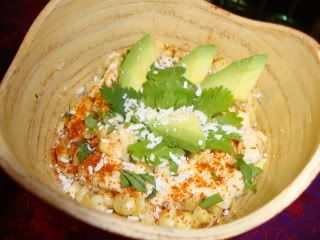
To enjoy elote in cups or bowls:
-Carefully cut kernels off the cob and place in bowl.
-Drizzle a swirl of mayo verde atop the corn
-Sprinkle with chili powder and chopped cilantro.
-Add a few small slices of avocado and some whole cilantro leaves
-Top with grated cotija
*Queso Cotija is a hard, salty cow’s milk cheese. Essentially, it is a Mexican parmesan! Tajo cheese is also a version of cotija, but it is fattier, more moist and less salty. For Elote Mayo Verde the harder queso cotija is recommended.

5.19.2010

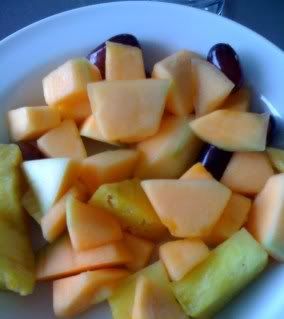
This is NOT a Fruit Plate!


This is a bowl of unripe cantaloupe, three sour grapes and 6 pieces of woody pineapple core-- tres trashy (and not in a good way). I paid six dollars for this travesty at a restaurant in Boston this past weekend and while I half expected somewhat of a letdown upon ordering, I was pretty disappointed with the extent to which this spread was mocking my intelligence. So, in response I am posting a list of spring and summertime fruit that you can reference when making your own morning fruit bowls or for judging that of your favorite local breakfast spot. In fact, if you ever find yourself in Santa Cruz, California for brunch, Harbor Café on 7th Ave has a gorgeous fruit bowl that will never let you down with a copious melon cop out!

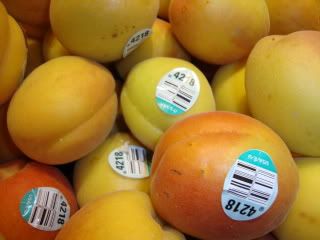
Apricots
-Pick plump, golden fruit with a pink blush and no sign of green. They should be firm with tender, velvety skin.
-Store at room temperature or refrigerate. Use within a day or two.


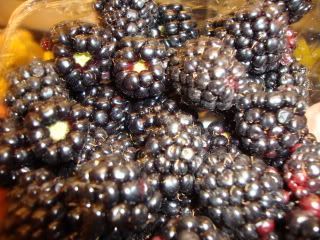
Blackberries
-Berries should be firm, plump, and fully colored. If picking yourself, berries should separate from the stem with minimal tugging.
-Store at room temperature or refrigerate in a single layer. Use within a day or two. Wash when ready to use.

Blueberries
-Berries should be firm, plump, and fully colored
-Store at room temperature or refrigerate in a single layer. Use within a day or two. Wash when ready to use.

Cantaloupe
-Should yield to slight pressure at the stem end. Sweet scent. Overripe melons will have a pronounced yellow color or moldy scent.
-Store at room temperature for 2 to 3 days and refrigerate after cutting. Remove seeds and skin.

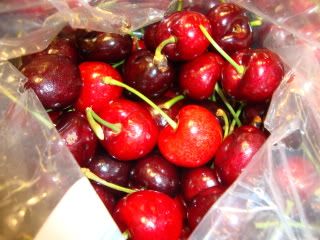
Cherries
-Stems should be green and flexible. Avoid soft spots, bruises, and splits. Red cherries are ripe when deep red. White and yellow varieties are ripe when flushed with pink.
-Keep at room temperature for a few days, or longer in the refrigerator. Do not remove the stem until ready to use as the cherry will lose freshness rapidly.

Grapefruit
-Pick grapefruits that are heavy for their size, firm and thin-skinned. Skin color varies from yellow to ruby red.
-Keep at room temperature for a week to 10 days or up 2 to 3 weeks in the refrigerator. Always refrigerate after cutting.

Kiwi
-Pick a kiwi that yields to slight pressure but doesn't have soft spots.
-Should be stored at room temperature for 3 to 5 days to ripen. Ripe kiwis can be refrigerated in a plastic bag for 2 to 3 weeks.


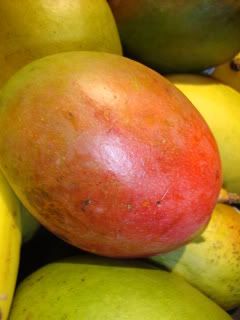
Mango
-Look for yellow-red skin with not too much green. Should yield to light pressure. Sweet aroma. Smaller ones are best.
-Keep at room temperature to continue ripening process. Pit is very large and will need to be cut around.

Nectarines
-Fruit should be plump with a sweet aroma. Skin should be smooth and not have any green color. Avoid hard fruit.
-Will keep at room temperature for a few days, or longer in the refrigerator.
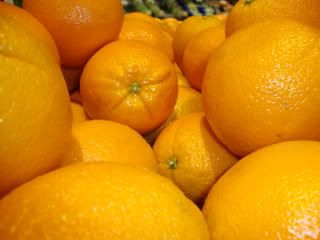
Oranges
-Look for firm, thin-skinned oranges for juicing and thick-skinned oranges for eating.
-Store at room temperature for up to one week, or longer in the refrigerator.


Peaches
-Yields to slight pressure. Very fragrant. Avoid soft spots, bruises, or greenish color.
-Will keep at room temperature for a few days, or longer in the refrigerator. Peaches bruise easily, so handle carefully.

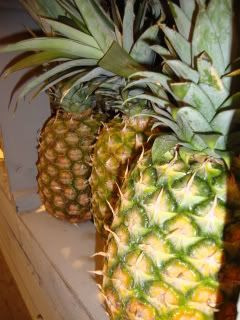
Pineapple
-Skin should be golden orange-brown. A gently pulled leaf will come away easily. Sweet scent.
-Will keep at room temperature for several days. Refrigerate after cutting. Remove leafy plume, skin, and core.
Raspberries
-Firm, plump, fully colored berries.
-Store at room temperature or refrigerate in a single layer. Use within a day or two. Wash when ready to use.

Strawberries
-Select berries with a universal red color and an intact green, leafy top. Avoid berries with soft or brown spots and check that none are smashed or moldy. Note that very large berries often have hollow centers and little flavor or juice.
-Store at room temperature or refrigerate in a single layer. Use within a day or two. Wash before removing green tops and only when ready to use.


Watermelon
-Should yield to slight pressure at the stem end. Sweet scent. Skin may be solid green, green-striped or mottled with white. Avoid melons that are very soft.
-Store at room temperature for 2 to 3 days. Refrigerate after cutting.


5.13.2010

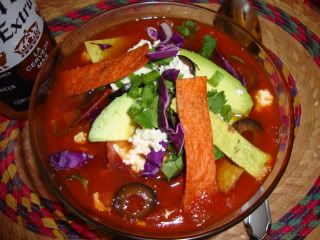
While living in Mexico several years ago I was introduced to a number of local dishes and flavors which I’d never heard of and still rarely, if ever, encounter stateside. This week’s Classh Course, however, is a dish quite commonly found on many Mexican, TexMex and fusion menus throughout the Southwest and California: Tortilla Soup!
Talavera Tile
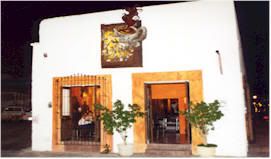
Casagrande is a restaurant in Garza Garcia, Mexico. My family could regularly be found eating at one of their Talavera tiled table tops and would frequently treat visitors for fresh regional fare. Located near the original campus of our school on Callè José Vasconcelos, my Spanish teacher was even known to bring the class there for a lesson in ordering food! On one such occasion, I ordered the Sopa de Tortilla. Having been vegetarian at the time, it was one of the few dishes which did not focus on some sort of meat (granted, the “caldo” was de pollo, but I was never squeamish about meat broths like I was the actual flesh). Now I know what you’re thinking, “But saraH, doesn’t tortilla soup have a ton of shredded chicken in it?” Not this one my friend. And, it being my first encounter with this type of soup, Casagrande’s Sopa de Tortilla has henceforth become the standard by which I judge all tortilla soups.

There is no corn in it. There is not a bean in sight. It does not come to the table like a huge bowl of nachos with some broth poured over and touted as “soup.” No no, the sopa I love is a much more delicate, personalized and intimate experience. The soup is served virtually naked.
Casagrande
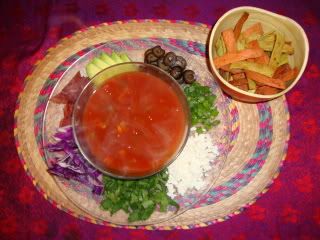
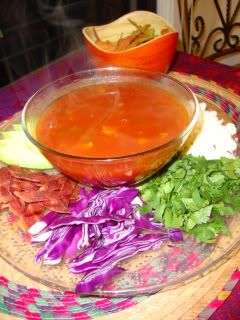
It is a tomato and chicken based broth with a medium thickness to it. Chilies, onion and garlic cooked in add a kick of flavor and just the broth itself could be enjoyed as a meal. Now, the part that I love, the part that sets Casagrande’s soup so high above the rest is the three tiered tray which accompanies the soup. Piled high with sliced jalapeños, queso fresco, cilantro, avocado, crema and of course the requisite fried tortilla strips, I was instantly a sucker for this Do It Yourself food experience. You can imagine my horror and disappointment upon learning that this is definitely not the common definition of tortilla soup here on my home turf. Therefore, I’ve decided to create my own version of the soup of my memory:
“Sopa de Memoria”

Serves 6
Sopa
1 medium yellow onion, chopped
4 garlic cloves, thinly sliced
½ can of diced green chilies
¼ cup SmartBalance
1 12oz can tomato paste
2 quarts veggie or chicken broth**
Salt and pepper

-Heat SmartBalance in large skillet, add onion and garlic. Cook covered over med heat, stirring occasionally. At about 12 minutes, add the chilies and continue cooking and stirring for 3 minutes or until all SmartBalance is just cooked down DO NOT BROWN
-In a large pot, combine broth and tomato paste. Once thoroughly mixed add veggies, salt and pepper to taste.
-Simmer over medium heat, 20 minutes.

Tortilla strips
4 burrito size tortillas
Spray butter
Flavored salt

-Preheat oven to 375 degrees F
-Cut tortillas into approx ¾ inch wide strips of manageable length (approx 2.5 inches)
-Spread strips on a large baking sheet and thoroughly spray with butter.
-Shuffle strips and re-spray so they are well coated
-Bake 5 minutes, shuffle and spray once again
-Bake 5 more minutes until edges are just browned, remove, spray and sprinkle with salt (I use homemade chipotle salt)

Fixins
(use your favorites- these are some of mine!)
½ bushel cilantro, coarsely chopped
1 bunch green onions, chopped
1 small can sliced black olives
¼ head of purple cabbage, chopped
1 package queso fresco, crumbled
1 avocado, sliced or cubed
6 strips turkey bacon, cooked and sliced**

-Arrange on a large serving platter, in individual bowls or divided onto each guest’s plate for DIY soup customization! Remember, Tortilla strips go first, then pile away on top!

**Don’t use turkey bacon or chicken broth and you have a totally veggie soup!

See you next week for another Mexican delicacy Classh Course!

5.11.2010

Forkth Up:
Thpanish Tapath at Picaro

After a long day of travel throughout Nor Cal on Sunday, my boyfriend and I found ourselves playing dinner guide to one of his college friends visiting from Chicago. We’re on Nob Hill while homie was staying with friends in Bernal Heights so the Mission was an obvious choice of where to seek out some grub. We met at Casanova for a quick PBR and to discuss dinner options amidst the dim glory of crushed glass lamps and naked breasts painted on black velvet.
I told y’all we keep it classhy.

While tacos and cervesa sounded just fine by me, the Bernal Heights kids were over it (and rightfully so) and then shot down my suggestion for Tokyo Go Go cuz they’d had Japanese for lunch (dang it!). At this point we were standing out on the makeshift plywood Valencia St. sidewalk and someone mentioned Ramblas tapas restaurant just a couple doors down. As none of us had been there before, we concurred and were fixin’ to head over just as the creeper lurking behind us in the doorway of the bar said,
     “I don’t mean to eavesdrop, but you should go to Picaro if you want tapas.”
     “Oh that place across from the Roxie on 16th?” I asked. Creepy nodded in acknowledgement and since I know they have bomb sangria I turned on my heels and led the way.

I’d been to Picaro once before after a snowboard movie screening at the Roxie. It was probably 11:00 at night then and not much else had been open. Regardless of the hour I remember the staff being very friendly and the little food we got being tasty and served quickly. As soon as we walked in on Sunday it was clear that the service was still the same. The large dining room was pretty full and the wait and counter staff all greeted us upon arrival. The five of us were quickly seated in a window facing 16th St. and given water, French bread with aioli and menus.

The Spanish menu is chock full of items to satisfy just about anyone’s tastes! I was a little bummed to not see any octopus offered, but the significant number of well priced lobster dishes more than made up for the loss. We decided to go the family style route and ordered an array of vegetarian and seafood plates. Unfortunately, two of the items we requested were out (squid cooked in its own ink being the biggest letdown) but once the rest of the tapas arrived, we soon forgot about it!

Patatas Bravas
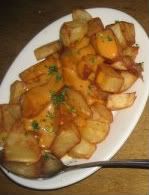
Almejas a la Plancha (grilled clams) were cooked to perfection in a light garlic-y sauce with parsley. The flavor was just smoky enough and the texture was nice and chewy without being slimy or weird (I can be pretty picky with my shellfish…). Patatas Bravas are a tapas staple and these did not disappoint. The deep fried potato cubes were well seasoned and the spicy aioli that topped them was creamy and rich. The Grilled Asparagus and Broccoli with Almonds were both fresh, tasty and simple. It was the Grilled Fresh Artichoke, however, which really took us by surprise! These were very thin cross sctions of the heart which still had a couple layers of inner leaves as well as all of the hairy choke. The pieces had been brushed with oil and simply grilled until lined. While they really didn’t look like much, they tasted incredible! It was a 100% artichoke flavor and the grilling left any sort of dip totally unnecessary. We were pretty shocked to see the choke spines and it was remarkable how they became edible when cooked in this way. These definitely went on the list for next time.

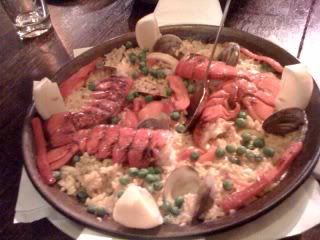
Finally, the crowning jewel of the meal arrived, a two person platter of Lobster Paella. 2 person? But, I thought you said there were five of you?! Well lemme tell you, after all of the samplings of delicious veggies and clams we’d just enjoyed, a two person paella was definitely large enough for us all to have a generous serving. The platter was topped with two splayed lobster tails as well several clams, peas and peppers. Since we’d been cheated out of our squid option in the tapas, we were all delighted to find a bunch of calamari cooked in with the rice. Much as I love a rare serving of lobster tail in front of me, I have to say that the squid was the best part of the paella. It had a wonderful waxy texture which was very reminiscent of my beloved octopus. We finished up our whole platter, two rounds of beautiful deep red sangria and left satisfied and happy for just $23 each.
Fanta-th-tico!

3120 16th St
San Francisco, CA 94103


5.05.2010

Feliz Cinco de Mayo!
In celebration of Mexico’s 1868 victory over the French, this month’s Classh Courses will be an exploration of some of my favorite dishes I learned of while living in Monterrey, Mexico.


While attending high school at the American School Foundation of Monterrey, there was a popular lunch time pick at the school cafeteria: You open a bag of Fritos then dump in a hefty spoonful of simple ground beef chili and an equally generous pull off the nacho cheese dispenser. Throw in some hot sauce, grab a spoon and you’re good to go! The warm concoction would invariably start to get a bit mushy and by the end you were eating limp Frito stew—que delicioso!

My interpretation of this school yard treat is as a scaled down and classhified appetizer that is perfect for your Cinco de Mayo Fiesta!
ASFM Cafeteria Nachos
While the chili used at school was definitely of the canned variety, Making your own simple chili is a snap and gives you the option to pass on the beef. Here is my simple vegetarian chili recipe:

La Huasteca ASFM Campus
Chili for 14 ASFM Cafeteria Nacho appetizers:
2 sliced garlic cloves
3 tbsp SmartBalance
½ package Smart Ground, Mexican Style
11oz V8
½ can pinto beans, drained
2.5 tbsp BBQ sauce (I use honey chipotle)
2 tbsp ketchup
8 drops Worcestershire sauce
Pappy’s or taco seasoning

-Heat 1 tbsp SmartBalance in a non-stick pan
-Add garlic and cook about 1 minute
-Stir in Smart Ground and remaining 2 tbsp SmartBalance. Cook over med/high heat until just browned.
-In a medium pot add V8, browned Smart Ground, and remaining ingredients. Season with Pappy’s or taco seasoning to taste—I’m definitely generous with it.
**I also had about 1/16 of a piece of leftover Vegetarian Harvest Roast from Whole Foods. I cut this into small cubes and added it to the mix. The great thing about is chili is getting rid of leftovers!**
-Bring mix to a simmer, cover and cook over med heat for approx 7 minutes. Stir occasionally.

To assemble appetizers:
14 aluminum baking cups
1 bag original Fritos chips
1 can Juanita’s Mexican Gourmet nacho cheese sauce
Sour cream
Your favorite hot sauce
Cilantro, chopped or hand shredded
Green onions, sliced

-Arrange baking cups on serving platter
-Fill cups nearly to top with chips
-Add spoonful of chili on top of chips
-Heat cheese on stove or in microwave
-Drizzle spoonful of cheese on top of chili
-Add dollop of sour cream to each cup
-Top sour cream with a few drops of hot sauce
-Sprinkle nachos alternately with cilantro and onions
-Serve immediately with regular or cocktail forks available

I made these last night in order to post today- they were very tasty while still warm from cooking! They definitely brought back the ASFM memories while updating the flavors just a bit. I saved the remainder of them in a muffin tin, very carefully covered with foil in the fridge. I will be reheating them in the oven tonight for some friends and will comment as to how that turns out!

Viva Mexcio!

Update: The evening of Cinco de Mayo I threw the nachos into a 350 defree F oven for just about 6 minutes... just until i could smell hot Fritos! They tasted great! I'd even go so far as to throw a little extra dollop of fresh sour cream on there. They weren't too mushy and still held their spicy taste! 

5.03.2010

Classhy Prince n' Pauper T.V. Dinners
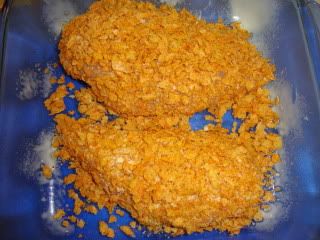
Bitchin' Chicken
Part 2- Cooking Challenge
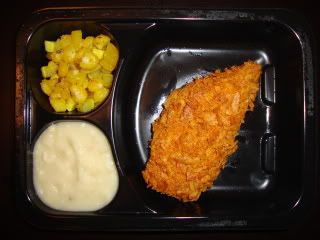
Fried chicken is a once yearly tradition in my family. On Father’s Day we grab a bucket and some sides from the local KFC and have a picnic on the beach or in any given park. For the life of me I can not figure out how this ritual came to be… at no point during the course of the year is there ever a collective pining for fried chicken. In fact, the name “Kentucky Fried Chicken” isn’t even uttered, nor does “bucket” mean anything besides the plastic 5 gallon version until about 1:00pm on the third Sunday in June. Perhaps it’s just that that one spread of extra crispy with coleslaw, mac n’ cheese and biscuits is enough to tie us all over for the whole year. Maybe 365 days is just long enough to forget the subsequent stabbing stomach pains from the picnic past. Whatever the case, fried chicken is also an all around American tradition and was immortalized as such when included as one of the four original T.V. dinners.


There are countless ways to prepare fried chicken including variations of meat prep, skin coatings and cooking methods. Without access to a bubbling vat of oil (nor particularly wishing for one) I decided to go the healthier route and make mine a baked “fried” chicken. With the help of a bag of Harvest Cheddar SunChips, some egg whites and a little butter spray, Bitchin’ Chicken is just that!


2 organic boneless skinless chicken breasts
¼ large bag Harvest Cheddar SunChips
4 egg whites in a bowl
Spray butter
Extra seasonings to taste


-Preheat oven to 350 degrees F
-Crush chips in a zipper style storage bag. A rolling pin works well for this. Note: the smaller the pieces, the better. The chip dust will coat the chicken well while the slightly larger pieces will add crunchy texture.
-Add some seasonings to your chip powder if desired. The chips are already pretty flavorful, but if you want an extra kick, a little cayenne or S&P won’t hurt!
-One breast at a time, first dip in egg whites, coating evenly. Immediately transfer to bag of crumbs and roll about until well covered in chips.
-Coat a square baking dish with non stick spray (I use spray butter)
-Place chippy breasts in baking dish and give each a couple spritzes of butter. Press some additional chip pieces onto breasts until well covered. Spray again and put in oven.
-Bake uncovered 1 hour
-At the ½ hour and 45 minute marks, lightly spray the breasts again


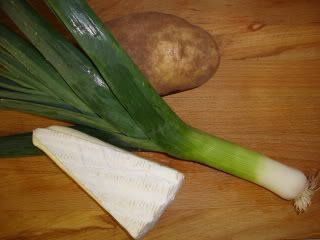
This week I was once again faced with a mashed potato side. Since I got away with a cauliflower mash on the last one, I decided to keep it real for my final challenge by sticking with potatoes. There really is a lot you can do with this classic side, so I let my imagination run wild! Since I had to keep the dish entirely white for the photo part of the challenge, I picked leeks and brie cheese as my additions to the potatoes.

Serves 2
1 large russet potato
1 medium leek, only white part sliced in rounds
3/4 wedge brie cut width wise into approx 1/8th inch slices
¼ cup milk
1/8 cup Smart Balance
White pepper and salt


-Peel and cut potato into large cubes. Boil in well salted water until very soft (approx 40 min)
-Sauté leek in 1 tbsp Smart Balance until cooked, but not browned
-After leeks cool, chop rounds into small pieces
-Once potato is boiled, put in large mixing bowl and coarsely mash with potato masher
-Add Smart Balance and milk, mash a little more
-Add brie and leeks
-White pepper and salt to taste
-Mash until brie is melted and potatoes are smooth and well mixed

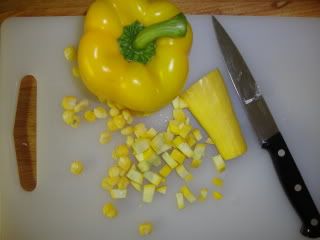
Corn, also, has been a common side throughout my T.V. dinner adventure. While it was completely unavoidable for the friend chicken meal, I was not about to surrender to the mind numbing and palate dumb-ing prospect of just another pile of boiled yellow corn. I felt it was very necessary, once again, to stick to the same colors found in the original dinner so I created an easy yet delicious hash of golden hominy, yellow bell pepper and yellow squash.

Serves 2
½ can of golden hominy
¼ yellow bell pepper, evenly chopped
½ yellow squash, evenly chopped
1 tbsp Smart Balance
Garlic salt


-Heat Smart Balance in non-stick sauté pan
-Add vegetables and cook over medium heat, stirring frequently 2-3 minutes
-Cover for about 30 seconds, stir, sprinkle very lightly with garlic salt, repeat
-Remove from heat once pepper and squash are just cooked through. Do not allow veggies to brown.


Note: Squash cooking times are sometimes tough to gauge since the vegetable will continue cooking itself once removed from the heat. I take mine off the stove, out of the oven or off the grill about 30 seconds sooner than seems comfortable. Keep a close eye on them squashies!


I was absolutely thrilled with the visual results of all the components. The potatoes were white, the hash was bright yellow and that chicken! Oh how golden and flaky it was! I was very excited about my SunChip chicken “skin” since it really maintained its crispy integrity and didn’t fall off the chicken as soon as it was cut into. It was very yummy and my conventionally fried chicken obsessed taster was raving at the technique. Bitchin’!
Being a vegetable lover, it was my two sides which really made me excited. This having been only my second time making mashed potatoes, I have to say I think I’ve found my future holiday potato recipe. As someone who’s always loved a little texture in my taters, these were unforgettable. The perfect creaminess of the potatoes is broken up by pieces of tender leek and slivers of brie rind which just melt in your mouth. I had thirds. And then more for dessert.
My only regret of the night was not making more hash! The simplicity of the execution of this dish combined with the distinct, bursting flavors of all its ingredients makes for a new favorite. If you come to my house this summer, expect this hash served with your eggs and tucked into your tacos! Yum!

Come back throughout May for this month's Classh Courses- a peek at some of my favorite classhy Mexican dishes in honor of Cinco de Mayo!