Classhy (CLASS-she):
The fusion of classy and trashy; when highbrow ingredients meet lowbrow concepts, and vice versa.

3.26.2011

Happy Birthday to my
favorite brother ever!
(he's the only one I've got)
 In honor of Corbett’s 22nd year on this Earth I am sharing a recipe I developed a few years ago to commemorate another mac and cheese lover’s birthday:

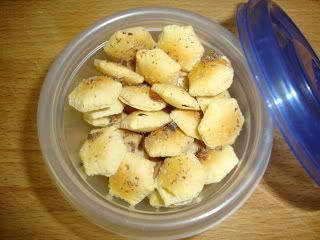
Macaroni and Cheese Cupcakes!
 Always a crowd pleaser, these quirky treats are little baked bundles of cheesy goodness—and the flavors are totally customize-able to your (or your soon to be delighted friend’s) tastes.
Classy Macaroni & Cheese Cupcakes
*Use aluminum, NOT paper cups!*

One box of Kraft Deluxe elbow mac and cheese (you know, the kind with the squeezy cheese packet) yields about 12 cupcakes. I tend to purchase a box per flavor combo I’ll be making with the knowledge that I’ll probably have a bit of mac leftover (oh darn).

I have three signature Macaroni and Cheese cupcake flavors:
Classy, White Trashy and Mexicano 
Here's How ya whip 'em up:
-Preheat oven to 350 degrees F
-Line muffin tin with aluminum baking cups
-Cook Kraft Deluxe according to directions. If baking more than one flavor of cupcakes, evenly divide the boxes of cooked mac into separate mixing bowls.
-Pick your favorite recipe (or invent your own based off these directions) and prepare accordingly.
-Bake cupcakes for 8-10 minutes
-Serve immediately or store refrigerated in a Tupperware- they reheat really well in a conventional or toaster oven!

For Classy 
Cupcakes:
1 medium large wedge of triple cream brie
1 package prosciutto
1/4 cup capers
1 tsp white pepper
2 drops of white truffle oil

-Scoop the soft cheese out of the rind of the brie and mix thoroughly into prepared mac.
-Cut or tear half of the remaining brie rind into bite size strips, set aside.
-Cut the other half of rind into small bits and mix into mac along with capers, white pepper and truffle oil.
-Scoop mac into baking cups, filling generously, then top with a strip each of prosciutto and brie rind.

For White Trashy
Cupcakes:
1/2 a cup of ranch dressing
4 slices of American cheese, torn into smaller pieces
Bacon bits (the fake kind, obvie)

-Mix ranch thoroughly into prepared mac.
-Generously scoop mac mixture into baking cups
-Top cupcakes with a few pieces of cheese and a healthy sprinkling of bac-o-bits


Happy bday, bro-there.

For Mexicano
Cupcakes:
3/4 cup chunky picante salsa
1/2 cup grated pepper jack cheese
1 small can pickled jalapenos with carrots, sliced smaller
1/4  cup sliced olives
1/2 cup sour cream or plain greek yogurt
Cilantro to garnish

-Mix salsa thoroughly into prepared mac
-Generously scoop mac mixture into baking cups
-Sprinkle pepper jack over each cupcake, top with a couple slices each of jalapenos and carrots
-After baking, top cupcakes with a dollop of sour cream, one olive and a cilantro sprig.

Mexicano Macaroni and Cheese Cupcakes


3.25.2011

Where the Hell ya been, lady?!
Found by Niall for me on the Interwebs.
Thanks, buddy.
There have recently been a few inquiries as to when Classy but Trashy will be updated again and I’m finally ready to address those concerns! 

I chowed down on some
HUGE pretzels at
Santa Cruz Mountain Brewery
in California
Things have been a bit crazy around the Classhyverse over the past couple of months—settling into a new life out in the middle of the Pacific, trips back to the mainland, entertaining a trove of badical homie houseguests and tons of new  creative projects. 
With all the excitement going on, as well as major shifts in the structure of my daily schedule, the format of Classy but Trashy has become unrealistic and is in need of reorganization. 
That being said, things are still classhy as ever around here and I have been dying to share the fun! So, in order to streamline the blog while increasing the number of posts, I’m going to be relaxing the layout to be more of a journal rather than a highly structured trapper keeper of looming deadlines (which it was starting to feel like). 

In keeping with this new simplified approach I have also added a Twitter account to the Classhy but Trashy and 
Hella'waii Foodventures blog family! 


Follow me @HellaClasshy  to get tweeterrific updates, tips, reviews and photos—as well as a place to share your own foodventures!
Felix visited twice!

Thanks so much for your continued support and as always, any comments and/ or suggestions are greatly appreciated!!


~saraH

1.15.2011

Good morning!!
It's the weekend again and hopefully you have a little time to chill out around the house and whip up some breakfast! During the week a lot of us don't have that extra couple hours for an uber delicious, nutritious meal first thing in the morning. One awesome way to hastily and tastily remedy the breakfast blues is with a nice trusty packet of instant oatmeal-- my personal favorites were always maple brown sugar and cinnamon spice! This morning, why don't ya grab a couple of your favorite flavors to bake up a fabulous batch of this week's
Breakfast Classh Course Number 2:
 Instant Oatmeal Muffins
with homemade streusel
Ingredients:
Makes 12 muffins
(enough to take some to work over the week!)

1 3/4 cups flour
1/3 cup sugar
2 tsp baking powder
1/4 tsp salt
2 packets of instant oatmeal
1 egg, beaten
1 cup milk
1/4 cup veggie oil
For the streusel:
3 tbsp flour
3 1/2 tbsp brown sugar
1/4 tsp cinnamon
2 tbsp butter
1/4 cup crushed nuts- mine are honey roasted macadamia nuts, fresh from Hawaii!


-Preheat oven to 400 degrees F
-Grease 12 muffin cups
-Mix dry streusel ingredients together
-Cut butter in with a fork
-Mix in crushed nuts
-Set mixture aside
-Combine dry muffin ingredients in a medium mixing bowl
-Create a "well" in the center of your powdered ingredients
-Pour liquid ingredients into the well and mix all together thoroughly
-Fill muffin cups 2/3 full and sprinkle streusel evenly on top
-Bake 15 minutes, or until a toothpick can be inserted in the middle of the muffin and extracted clean
-Serve warm with butter and honey!

These muffins are super tasty and the familiar flavor of the instant oatmeal is warmly comforting- a perfect way to start your day!


1.07.2011

Originating in the late 1800's, Eggs Benedict was invented as a either a hangover cure, or a cure for a boring breakfast menu, depending on who you ask. If you ask me, however- I'd say the dish adequately fulfills both purposes! A classic eggs benedict consists of a slice of ham and a poached egg stacked neatly on top of an english muffin and then doused with hollandaise sauce. While there are multiple variations of this recipe, one factor remains the same- they're all delicious! When eating my first meal of the day out at a restaurant, I always look for a Benny!
Unfortunately there are times when you may find yourself seated at a restaurant who's menu has yet to employ the de-borifying powers of a yummy benny. When faced with such a dilemma it is inevitable that the lunch menu will start to look that much more enticing. It is in this section, laden with Cesar  salads, fish n' chips and cheese burgers that you will hopefully find another classic hailing from the late 19th century... The Club Sandwich! A delectably stacked sandwich, the club incorporates turkey, tomato, bacon and lettuce between three slices of toasted bread and held together with the ubiquitous frilly toothpick. Once again, variations abound and being a California girl that usually means the addition of avocado, sprouts and some honey mustard!
This week I decided to take the best elements of both of these menu favorites and slam 'em together for a breakfast dish home run that would make Denny's blush:

January Classh Course Number One
Club Benny
with homefries

Ingredients:
Serves 2
2 Sourdough English muffins
8 Slices oven roasted turkey lunch meat
1 Tomato, sliced
4 Eggs
1 Packet hollandaise sauce*
4 Strips of bacon
1/2 a Hass size avocado
1 cup Clover sprouts
1/4 cup White vinegar
Sweet Hot mustard
Mayonnaise
Paprika
White pepper
Salt
For Home Fries:
2 Russet potatoes, peeled, cubed and rinsed in cold water
Seasoned salt
4 Pickle chips
1 Frilly toothpick


-Cook bacon in a skillet until crispy. Cut into medium/large size crumbles and set aside. 
-Throw potato cubes into bacon skillet. There should be about 2 tablespoons of bacon grease in the pan already-- if not, add a little veggie oil. Mix cubes until well coated, sprinkle generously with seasoned salt, cook covered (stirring once or twice), over medium heat for 10 minutes. Remove lid, sprinkle more seasoned salt and cook (stirring frequently) another 10 minutes. Put in a warm oven until ready to serve.
-While potatoes are cooking, slice avo and tomatoes to prepare a veggie plate for quick benny assembly.
Thanks for the plate, Nat!
To poach eggs:
-Crack each egg into it's own shallow bowl, cup or ramekin. Keep close to the stove for quick use.
-In medium-large nonstick pot bring three inches of water and 1/4 cup white vinegar to boil, then turn heat very low so water is slightly simmering.
-Quickly and gently slip each egg into the water, taking care not to let the whites mix with eachother. 
DO NOT BREAK YOLK
-Using a spoon, gently ease each egg's whites closer to the yolk. 
-Keep an eye on the eggs, taking care not to molest them too much, but making sure they stay together.
-Cook for 3-5 minutes depending on desired yolk hardness (I do mine for 4 minutes)
-Remove each egg with a slotted spoon and place on a plate with paper towels. Dab the excess water off gently and let sit for about 2 minutes

This was my first time poaching eggs and I was HELLA nervous! I don't know what I was expecting, but I was pretty shocked by the sight of the eggs all flowery and flow-y in the water. My hands were shaking as I pulled the eggs out of the poaching liquid. In the end, though, they were so beautiful and perfect. yay! Of course I later learned that people sometimes will put the eggs in plastic bags to keep them contained while poaching. Sounds like cheating to me! 


-Cook up hollandaise packet, adding some paprika and a dash each of white pepper and salt. Where the packet calls for water, use 50% water and 50% milk for a creamier sauce.

-Toast English muffin
-Spread mustard on one muffin half
-Spread mayo on other muffin half
-Place 2 slices of turkey on each muffin half
-Add 2 tomato slices to each muffin
-Place one egg on each muffin
-Drizzle hollandaise sauce over everything!
-"Sprinkle" avocado and bacon crumbles on top
-Finish with a tuft of sprouts 
-Plate homefries alongside Club Benny and garnish with pickles and frilly toothpick 


The Club Benny truly does embody the most delicious elements of Eggs Benedict and a Club Sandwich.  It's a match made in brunch heaven and I think you'll agree! 

Come back next week for 
January Clash Course Two:
Instant Oatmeal Muffins
with homemade streusel

*Hollandaise sauce made from scratch is an emulsion of egg yolk and butter then spiced up with lemon juice and pepper. If ya wanna get all classy pants, make it yourself. The words "emulsion" and "egg yolks" sound disastrous and curddlesome to me. The work "packet," however, sounds surefire and classhy as all get out, so bring it on! 

1.06.2011

January is a time for new beginnings and starting over with a fresh slate. Gym memberships spike, journals are begun with resolve and the dog gets walked far more regularly. For about a week. Well fortunately for all of us good intentioned slackers out there, January 1st isn't our only opportunity to start life anew. In fact, we have a chance for redemption every day- its called The Morning! And with it comes what has oft been touted (though greatly disputed) as The Most Important Meal of the Day.
Breakfast!!
I'll admit that I've never been real big on breakfast. I tend to lean toward the lunch side of things, so if i find myself  at a restaurant in the morning, I'm usually the freak with a spinach salad while everyone else is rocking out on their belgian waffles and croissant french toast. I think part of it comes from associating breakfast with sweet foods- syrup, sugar, fruit... As a decidedly salty palliated person, I'm not too keen on pancakes or Capt'n Crunch (I know, how can I be trusted?!). 


I've also lived most of my life with an underlying fear of eggs. They've always sort of resided in the "gross out" section of my tastes-- not due to their flavor but more so the threat of bloody yolks, partially developed chicks and that time my vegan friend called me an abortion eater. You know, the usual.  


All that being said... I am getting older and my tastes are changing. I've discovered a few yummy eggs plates to order and sweet is finding it's place on my radar.  Actually making these dishes at home, however, has proven to be a challenge since I have no eggsperience! 


So this month I will challenge myself with four classic breakfast dishes which incorporate eggs and/or sweets--with a classhy twist-- and just in time for your weekend brunch! 
Come back tomorrow for Classh Course One:
Club Benny!
...where the breakfast and lunch menus collide!

1.01.2011

Happy New Year!!


...and long time no see!
It's been a while and a bit has changed... I'm no longer living in San Francisco, but am now a resident of Koloa, Kauai, HI! It's been a crazy transition but now the new year is upon us and I can already tell 2011 will be more classhy than ever!
Classy but Trashy will be back up and running on a regular basis as of today. This will still be your go to spot for the best in classhy concepts!


I am happy to also announce the launch of Hella'waii Foodventures, which will detail my more specific exploration of Hawaiian Island food, traditions and flavors!


Now I know y'all prolly don't have the highest tolerance for reading today...
So, dust the confetti out of your hair,  go nudge the passed out revelers awake with the toe of your broken stiletto and ring in this bloodshot afternoon with a tray of frickin' delicious

Miracle Slim Jim Bloody Marys 

Ingredients:
Serves 1 pint size cocktail

1 tall shot of vodka
1 tablespoon green olive juice
1 tablespoon pepperoncini juice
12 shakes of red Tabasco 
3 drops worcestershire
Mr. and Mrs. T's Bloody Mary Mix*  
Celery salt
2 tablespoons lemon juice
2 large, pitted green olives
1 medium pepperoncini
1 Slim Jim
1/2 a pint glass of ice, or 6 large ice cubes
1 pint glass

For Slim Jim Spears:
-Cut Slim Jim in half
-Cut one end of each half into a point
-Pull pimientos out of olives with the tip of a knife (if applicable)
-Cut the end of the olives with the "x" on it off so there is a good size hole on each olive end
-Cut an "x" through each side of the pepperoncini
-Spear olives and pepperoncini onto Slim Jim, set aside. 


As most of you know, a good Bloody Mary is really good. A mediocre or bad Bloody Mary is disgusting and inedible. This recipe is simple, effective and all my own. It's also a great base to work off of if there are Bloody elements that you love and would like to add (like, perhaps, a Guinness float!). 

-Put lemon juice in a shallow bowl
-Cover the surface of a small plate with celery salt
-Dip the rim of your pint glass in the lemon juice, then coat with celery salt
-Fill glass halfway with ice cubes
-Add vodka, olive juice and pepperoncini juice
-Fill remainder of glass with Mr. and Mrs. T's 
-Shake about 12 drops of Tabasco into drink
-Add about 3 drops of worcestershire 
-Mix with Slim Jim Spear
-Add an extra sprinkle of celery salt for good luck
-Serve and enjoy!!


*It HAS to be Mr. and Mrs. T's. No V8, No weird homemade mix your uncle Sal swears by. So far the Mr. and Mrs. are the only one's who know what's up time and again!


6.16.2010

We could not have asked for better picnic weather so far this month! Last weekend was no exception as the sun was out and there was a pleasant breeze moving throughout the city. Waking up to such lovely conditions made my anticipation of the day’s picnic that much greater—we were heading to the waterfront!
Pier 1 Picnic
New England Clam Chowder in Sourdough Cups, Zesty Caesar Salad,
Perfect Lemon Bars and Sorbet Green Tea Jars
I have a definite weakness for clam chowder in bread bowls. What I don’t have a weakness for, however, is how freakin’ huge they always are! Stop me if I’m wrong, but an entire loaf of sourdough hollowed out and filled with rich, creamy soup seems a bit excessive. I mean, I love fresh, flaky bread, and I love a good chowder, but I certainly don’t want to overdose on either of those things—particularly in the same sitting. This technique is a scaled down version of the classic bread bowl-- a bread cup, if you will. You still get all of the fun of dipping the bread top in your soup, scraping the soggy sides of the cup out, and tearing up the hollowed out shell—simply in a more manageable size!


No, I did not make my own clam chowder. I’m far too classhy for that. Instead I picked up a can of Progresso New England Clam Chowder—it’s cheap, delicious and gets the job done without making your kitchen (or hands!) smell like raw clams.

New England Clam Chowder in Sourdough Cups
Serves 2
1 can New England Clam Chowder
2 dinner size sourdough rolls (make sure the outsides are nice and crusty)

-Cut the tops out of the rolls like a jack-o-lantern
-Through the hole in the top, lightly cut through the inside of the roll (don’t pierce the bottom!) and pull out the majority of the bread. Leave more or less on the sides based on preference, but make sure there’s enough room for your soup.
-Heat chowder according to can instructions.


For my take on this classic wharf staple I also offer a number of toppings for picnickers to customize their soup as they please:

Sliced green onions
Bacon bits
Grated Monterey jack cheese
Grated Colby jack cheese

To Pack:
-Put the tops back on the rolls and tuck them into a paper or plastic bag.
-Transfer chowder to insulated thermos container for travel.
-Pack toppings into a sectioned Tupperware.

At the Picnic:
-Pour chowder into bowls.
-Pile on your favorite toppings!


One of the great things about scaling down the bread bowls to cup size is that it leaves room to enjoy other flavors in the meal as well—like a little Caesar salad! This is a basic salad with homemade zesty Caesar dressing and topped with oyster cracker croutons. It’s simple, extremely tasty and travels well!
saraH’s Simple Zesty Caesar Dressing
1 cup SmartBalance mayonnaise
1 tbsp lemon juice
1 tsp Worcestershire sauce
1 large clove of garlic, crushed
½ cup grated parmesan
1.5 tbsp milk
1 tsp spicy, brown or Dijon mustard
¼ tsp salt
Few shakes of celery salt
Pepper to taste

-Just whisk it all together until it’s well blended!
-Stores well refrigerated in a jar

Oyster Cracker Croutons
For two salads
½ cup oyster crackers
1 tin of anchovies in oil
Lavender salt

-Preheat oven to 350 degrees F
-Lay crackers out on a baking sheet
-Drain oil from anchovies into a small bowl
-Cut a small bit off of one of the anchovy fillets and mince. Add to oil.
-Using a cooking brush, brush anchovy oil and bits onto the tops of the crackers.
-Sprinkle each cracker with lavender salt (make your own or use Eatwell Farm’s version)
-Bake 5 minutes

Salad for 2:
1 organic romaine heart
-Cut or tear leaves into bite-size pieces

To Pack:
-Put ¼ cup dressing in a to-go jar or Tupperware
-Oyster croutons travel best in a small plastic container
-Pack lettuce in a plastic bag or container


At the Picnic:
-Distribute lettuce on plates
-Drizzle dressing on romaine
-Top with oyster cracker croutons


Lemon bars are absolutely a classic favorite. These lemon bars are my mother’s recipe and considered legal tender in five countries. They are also the perfect addition to a waterfront picnic on a warm early summer day!
Kim's Epic Lemon Bars
Crust:
1 cup sweet butter
½ cup powdered sugar
Dash of salt
2 cups flour

-Preheat oven to 350 degrees F
-Prepare a 9x13 baking dish with butter and flour
-Combine all ingredients and mix well
-Press dough evenly into the bottom of the baking dish
-Bake 15 minutes

Filling:
4 large eggs, beaten
6 tbsp lemon juice
2 cups sugar
¼ cup flour

-Keep oven at 350 degrees F
-Mix sugar and flour together
-Mix in eggs and lemon juice
-Pour onto slightly cooled, baked crust
-Bake 25 minutes
-Once cooled to room temp, sprinkle with powdered sugar
-Cut into squares
-Keep bars in the fridge

To Pack:
-If made right before the picnic, lemon bars should be slightly chilled in the fridge before travel.
-Stack in a Tupperware with wax paper between layers.

At the Picnic:
-Simply serve!
***Beware*** People will be jealous and might shoot you dirty looks or try to befriend you for extras!

This off-the-cuff green tea and sorbet refresher is a wonderful finishing touch on this well rounded Pier 1 Picnic:
Sorbet Green Tea Jars
For Two:
16 oz unsweetened green tea
Fruit sorbet (I used peach and strawberry)
Ice
2 mason jars with lids

-Fill jars with ice
-Pour in 8 oz green tea in each jar
-Top tea with a scoop of sorbet

To Pack:
-Screw lid on and throw jar into your basket!
At the Picnic:
-Unscrew lid and throw tea down your gullet!

Pier 1 Picnic Essentials for 2:
Picnic basket
Oil cloth for sitting
2 plates
2 forks
2 spoons
Napkins
Varied Tupperware containers
Plastic and/or paper bags
2 Mason jars

With a beautiful day! And with the San Francisco Bay spread before us, the Pier 1 Picnic could not have been more of a success. Everything was delicious and the sights were unforgettable. Tucked away at the end of Pier 1, there was nary a tourist in sight and we were able to completely avoid all of the flying lures and fish guts that are so prevalent on the other public piers.


Be sure to make this great San Francisco picnic one of your tasty summer goals!